Testimonials are a powerful way to reinforce the benefits of your products. Our testimonial software gives you control over which testimonials are displayed, and how they’re displayed. There are more than a dozen different display options, offering single and multiple testimonials as well as some fancy animations.
NOTE: These instructions apply if your testimonials are displayed in a POPUP.
Access
Login with your administrator credentials and display the WordPress dashboard. Hover over or click “Testimonials”.
Click on “Testimonials” from the dropdown menu to display a list of all testimonials. From this screen, you can add a new testimonial, or change/delete an existing testimonial.
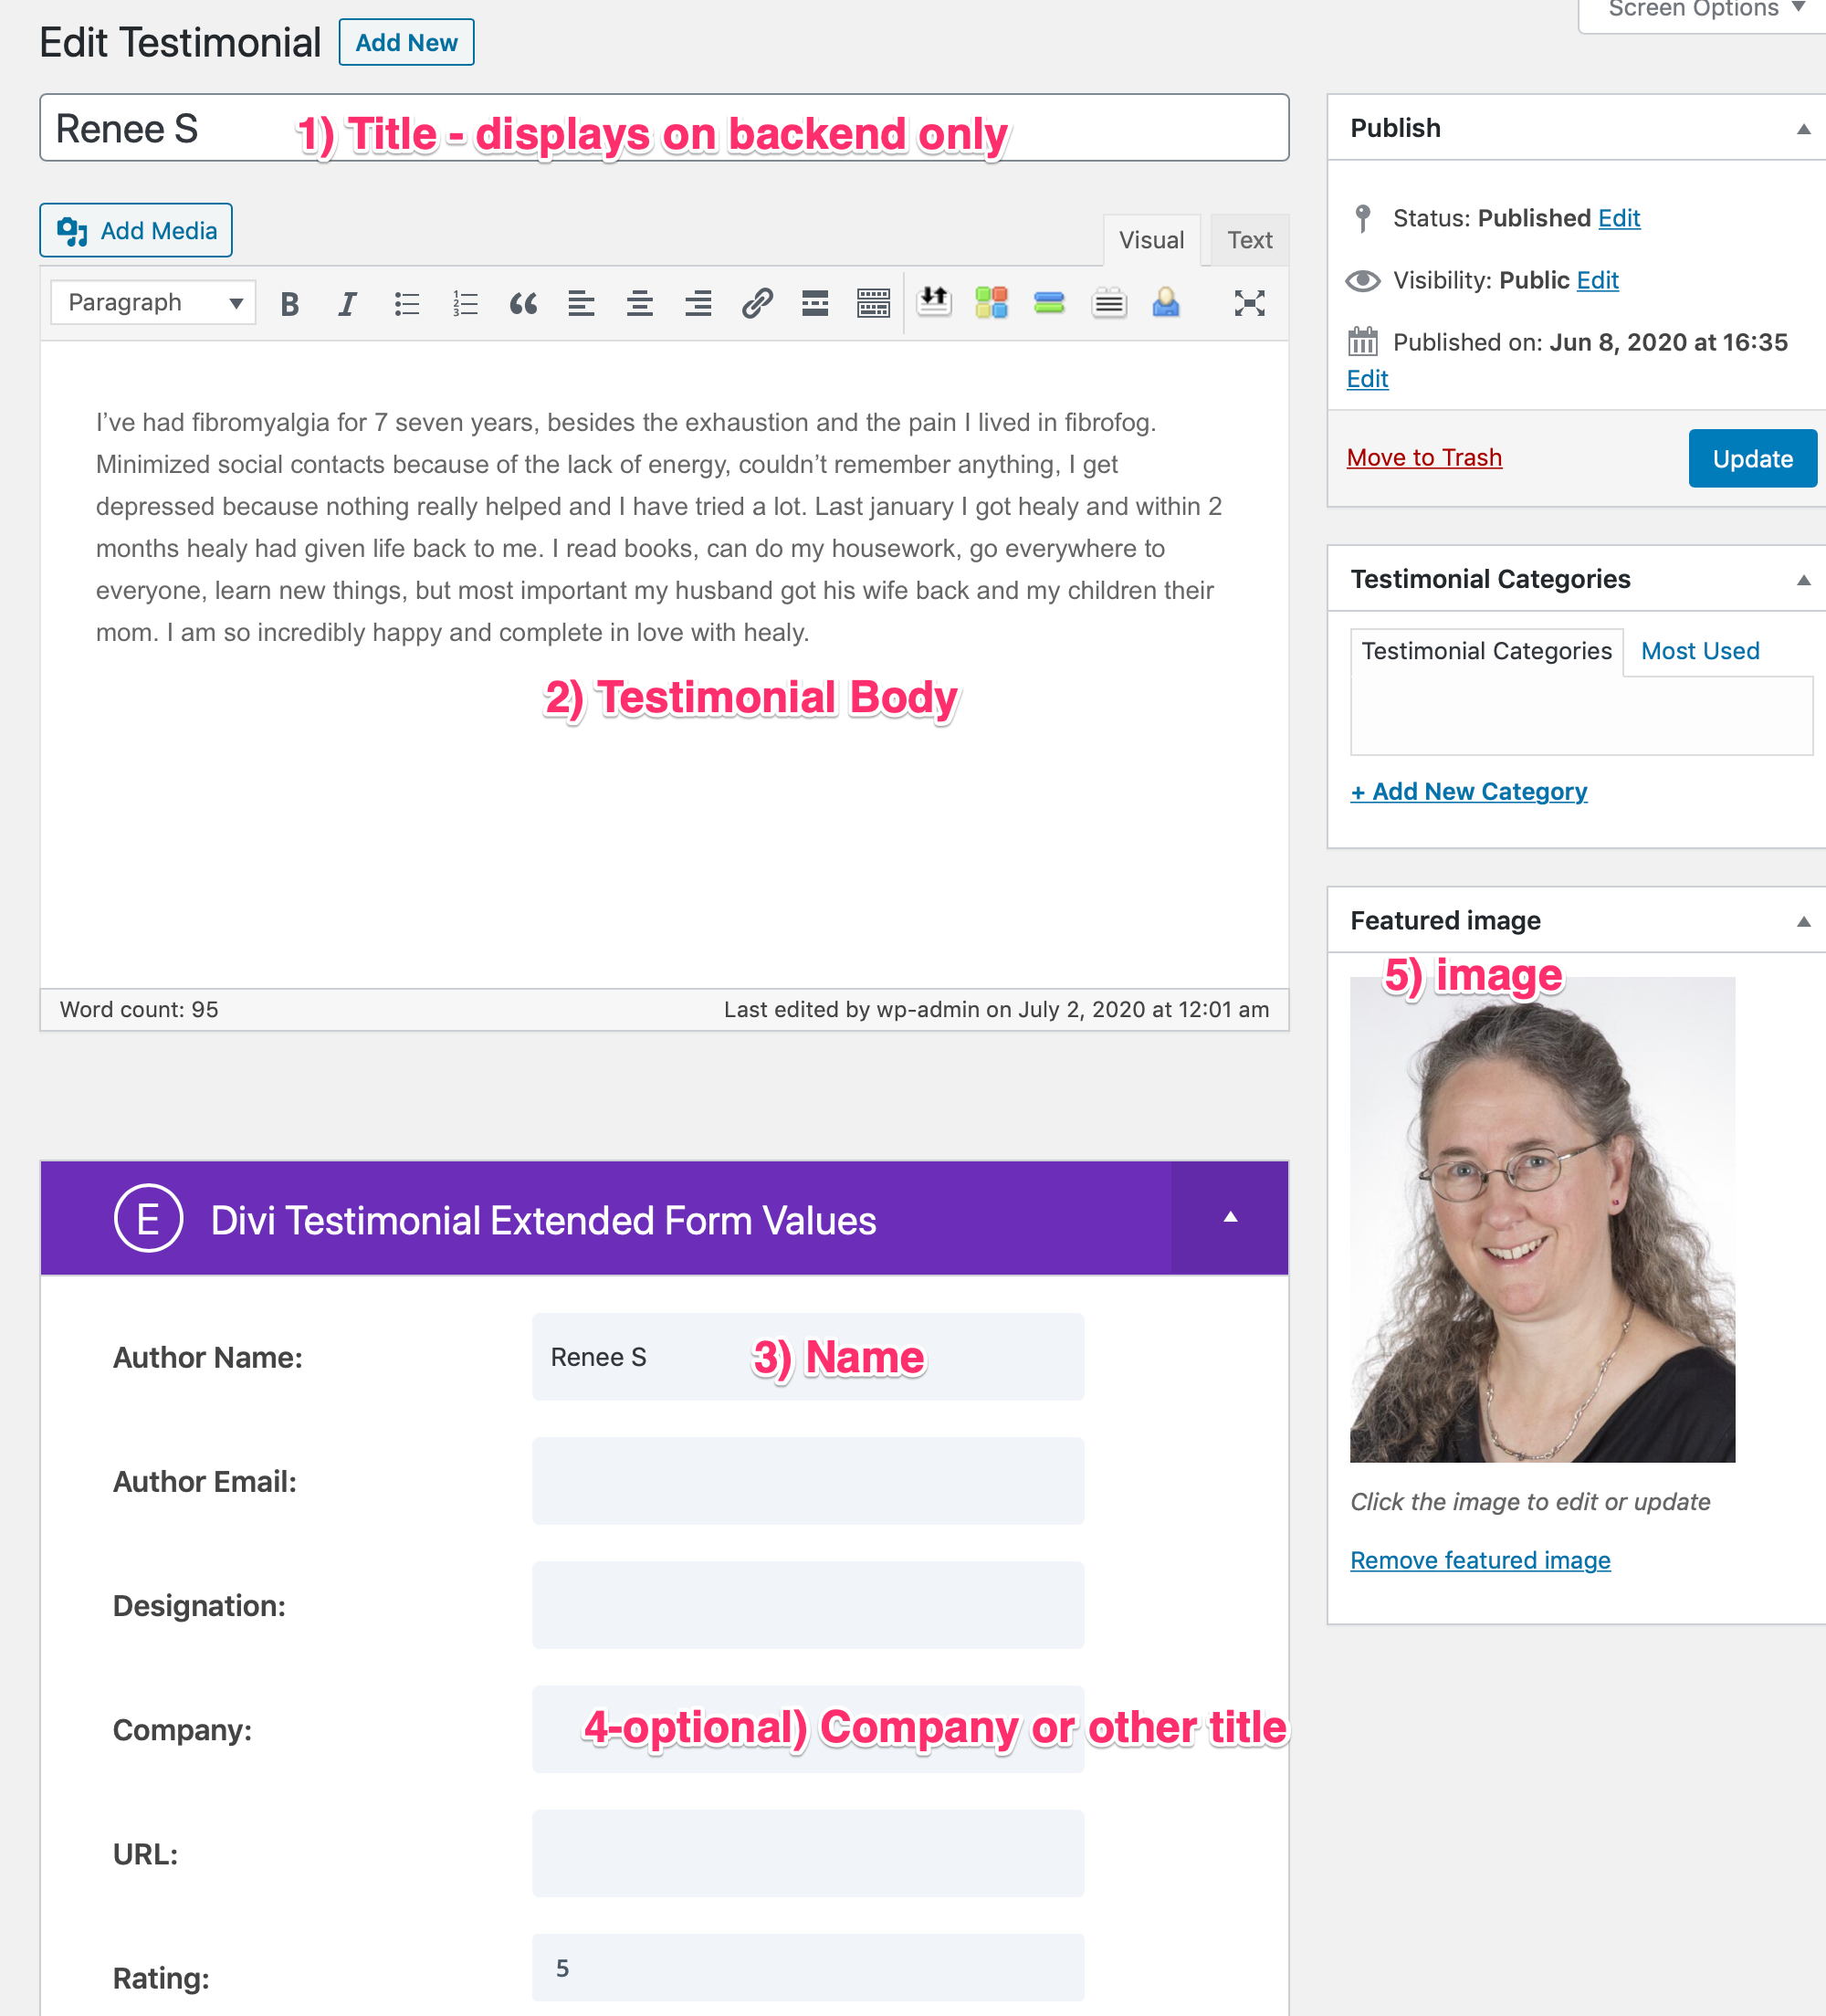
Testimonial Fields you should use
- 1) Title: this is the name of the person giving you the testimonial. Use their full name for easy reference
- 2) Testimonial Body: this is the actual testimonial
- 3) Author Name: you’ll have to decide if you want to use full names or First Name + Last Initial
- 4) Company: This is optional, and you put anything you want here
- 5) Image: upload an image from your Media library
 Setup
Setup
This software is a premium “Divi” plugin. That means that the options that control testimonial display are actually defined in the Divi module on the website’s funnel page.
- Display the main page, then select “Enable Visual Builder” at the top.
- Scroll to the testimonial section, hover over one of the testimonials, and click on the “Module Settings” gear. This will display module options.

- The module displays a maximum of 10 testimonials, but you can display them in any order you please.
- Expand ( ∨ ) “Layout” to select the layout you want. You can either visit the plugin website or experiment for the effect you want. The best way to do this is to open two browser windows – make the changes in one window, and refresh the page in the other window to see the effect.
- When you’re satisfied with the effect, click the green check at the bottom right of the module screen, and exit/save the Visual Builder.

